Starting the Downswing in Golf
While the takeaway is important, there is a saying... “You don’t hit the golf ball with your backswing.” Through the years we have seen great players with their own way of swinging the club back. Two of the biggest money winners in PGA Tour history are Jim Fuyrk and Matt Kuchar, and they could not be further away from each other at the top of the swing. The acceptable corridors to swing the club back are so much larger than coming down. The golf downswing, in particular coming into the ball shallow versus steep, is what separates all levels of ball strikers.
The Golf Downswing Sequence
The key factor in how to start the downswing in golf is the sequence. This is the DNA of a golf swing, and really what separates the best players from high handicappers. Just like all other athletic movements, there is a pattern of movement that is needed for consistent ball-then-turf contact, accuracy and distance.
1. Good arm structure at the top
2. Plant the Left Heel
3. Shift Your Pressure

4. Knees Follow the Hips
5. Rotate Hips Before Arms
6. Tuck Your Trail Elbow
7. Keep The Lead Shoulder Down
8. Wrist Bend and Hinge
Start a Correct Downswing with Swing Align!
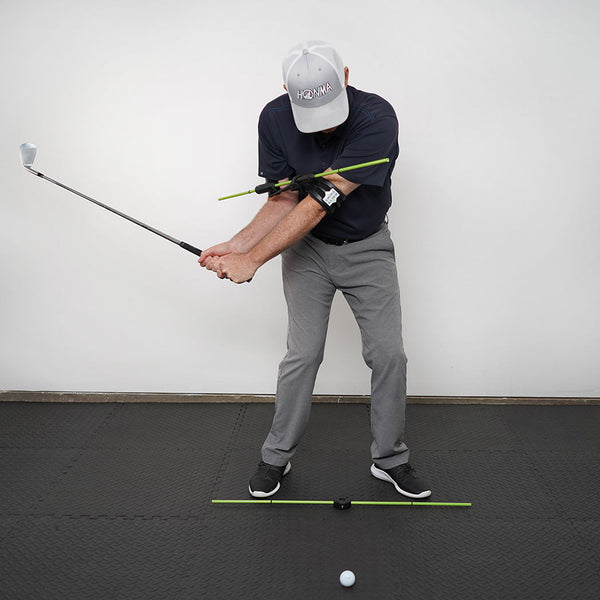
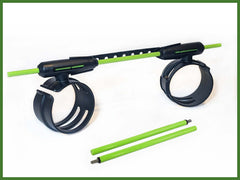
So, how to put it all together, how to start the downswing? The correct golf downswing sequence starts with a pressure shift to the lead leg, followed by your arms dropping and elbow starting to tuck close to your body to shallow the angle of the club, before rotating the torso through to impact. Using the Swing Align device is a huge help in visualizing and rehearsing these complicated body positions, in particular when it comes to how to start the downswing. When the lead arm is parallel to the ground on the way down, make sure the rod across your chest stays level or pointed slightly down toward the ball.

At this the trail arm should be moving under the lead arm. You should still have the same spine angle with your lead shoulder and chest down. Don’t stand up out of your posture! As your golf downswing sequence continues, and the club approaches parallel with the ground, your trail elbow should be close to your body. Your shoulders will level out and the front end of the alignment rod should start to point up. Understanding and practicing this sequence, and seeing it demonstrated physically by Swing Align, will do a lot to help you improve!

What not to do! The two big no-no’s are as follows.
- An aggressive arm pull, or upper body lunge from the top. This will get the club too steep and kill a successful downswing with little chance to hit a good shot. Do not start the downswing with your arms!
- Standing up and coming out of your posture early. This is one of the worst moves you can make in a golf swing. Although the intention is good, the results will be disastrous, coming in steep, toe down and face generally open, with a loss of both power and control.
Perfect Your Downswing with Swing Align!
With the downswing sequence being so important in regard to your success in golf, why would you ever practice without feedback? Swing Align helps with so many important aspects of the golf downswing, all with one easy to use wearable device that allows you to rehearse positions as well as hit actual golf shots. Because of the highly visible alignment rod you can see the shifting of the lower body first without opening up with the upper body, allowing you to practice much more effectively. It is also easy to see and feel how the trail arm needs to work under the lead arm. Finally, the connection belt will ensure your arms stay in a good package at the top of your swing, connected to your body and in front of you for improved impact. A little practice with Swing Align at home or on the range will lead to better results on the golf course. Get yours today!


